DIY Marquee Sign Letters
Marquee signs are everywhere correct at present. They add a great retro, industrial feel to any space. Marquee signs brand a specially magical seasonal decoration. There are many available for sale, simply these also make a great DIY projection. Marquee signs can be customized for size and colour. Plus, with this DIY tutorial, they can be rearranged to say any word (or words) yous want. This tutorial uses papermache letters, painted copper, with non-electrical "lights" for stand up-alone simulated marquee signage. Ready to get started? Let's go.
 View in gallery
  View in gallery
 DIY Level: Beginner
 View in gallery
 Materials Needed:
- Paper mache letters (example uses 15" letters: North, O, Due east, Fifty, and V)
- Spray paint
- ane" silver decoration balls
- Razor bract with very sharp (new) blades
- Hot glue gun and glue sticks
- Paper hole reinforcement circles (not shown)
 View in gallery
 Ensure your razor bract is new or very precipitous. This is critical for clean cuts. Trust me. I started with a semi-abrupt blade and had a bit of cleanup to do on the inside edges.
 View in gallery
 Lay one letter flat on your piece of work surface. Cutting the top "face up" off of each letter. Tip: Corners are key for a well-baked, clean look. Likewise, angle your razor bract toward the center of the letter box for a sharper, more precise cut.
 View in gallery
 Utilise the razor blade to carefully lift and remove the acme of the letter.
 View in gallery
 Empty the inside of the paper mache alphabetic character box, if at that place'southward anything within.
 View in gallery
 It's looking good. Examine the inside edges of your letter of the alphabet.
 View in gallery
 If there are any snags or any, use your razor blade to "shear" them off. These will be less frequent if you lot utilise a very abrupt razor bract.
 View in gallery
 With the tiptop off your alphabetic character, you're ready to mark the positions for the "lights." I recommend doing this at this point, earlier it'southward painted, because it is easier to correct a mis-marker. You may choose to measure the lite positions with a ruler to ensure precision.
 View in gallery
 Or you may choose to marking the "lights" positions based upon the individual alphabetic character's layout. For these 15" letters, I used five lights downward the direct vertical, marker the two end lights get-go, then the very eye, and so the other two heart lights.
 View in gallery
 Once the pencil marks themselves are fabricated to your satisfaction, and the "lights" placement is even and aligned, pull out your reinforcement labels.
 View in gallery
 Place a label over each pencil mark. These will provide a great circular marker for each light'due south placement afterwards the letter is painted, because the label will be painted only will exist subtly visible plenty.
 View in gallery
 This particular layout (plus a "5") requires 60 (v dozen) 1" petite ornaments. Conform according to your preferences. Tip: The letters N, O, E, L, and V will spell "NOEL" for Christmas and "Beloved" for Valentine'southward Day. And "NOVEL" for your volume social club year-round, of course.
 View in gallery
 Lay out the letters on a painter's sail.
 View in gallery
 Spray several coats of paint onto the letters, allowing them to dry between coats as per the spray pigment directions.
 View in gallery
 Originally, I used hammered copper spray pigment. The outcome was okay, but it was less metal than I wanted. (This photo appears more metal than in real life.) Marquee signs are traditionally fabricated out of metallic, and I wanted these papermache letters to pass for that. Only I include this photo of the hammered spray pigment's consequence for you to make your ain selection.
 View in gallery
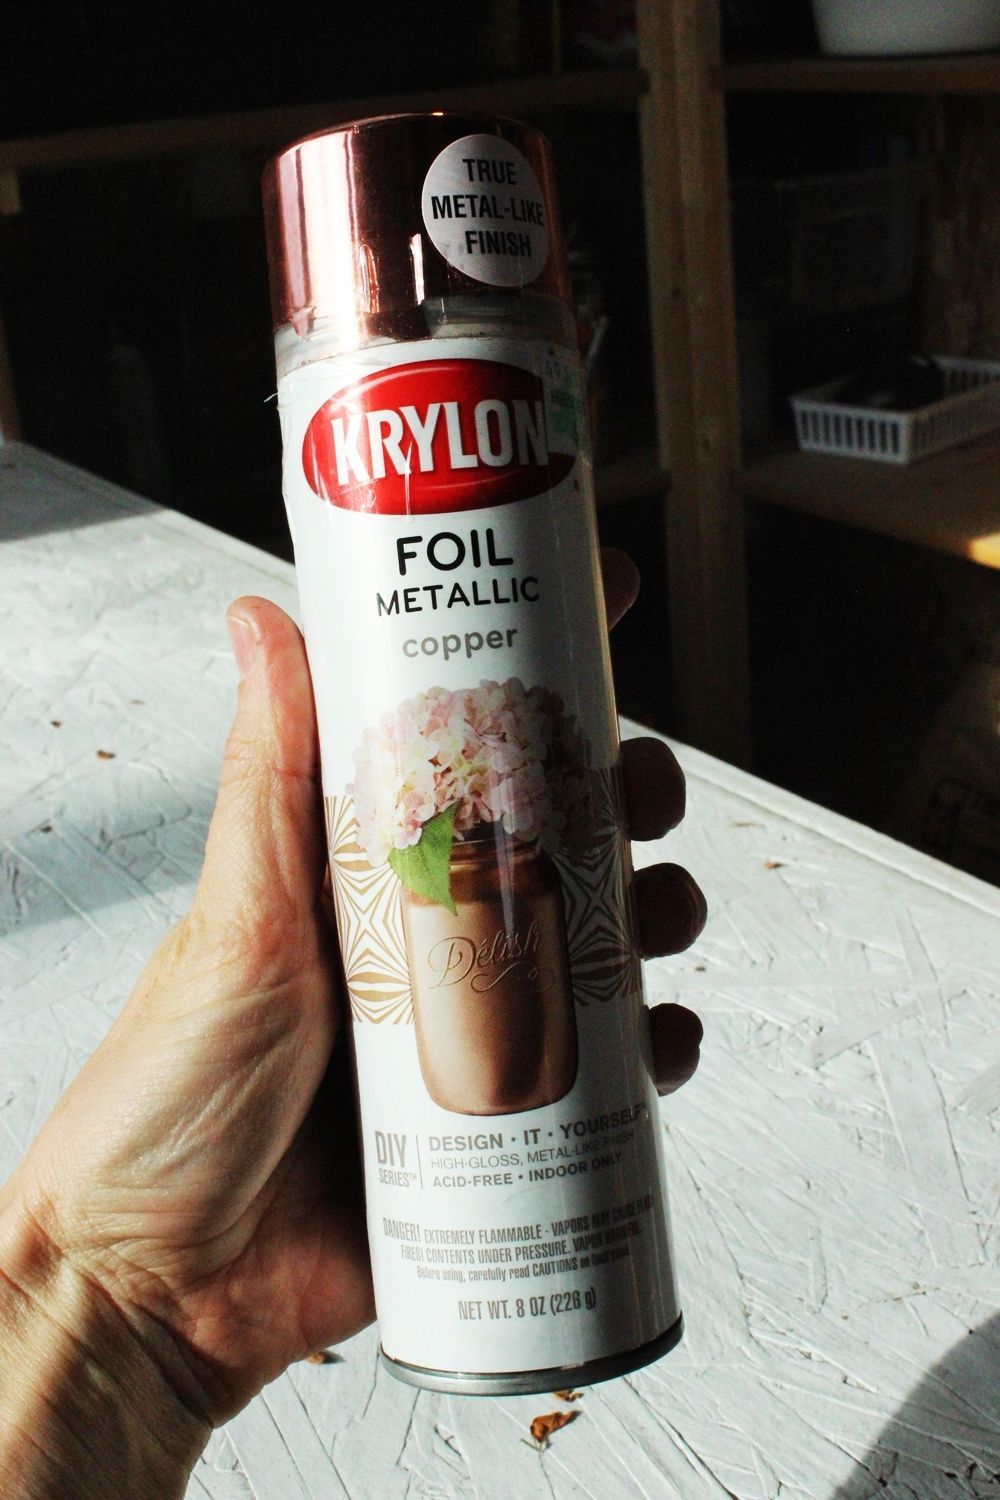
 I ended up going with Krylon foil metallic spray pigment in copper, painted over the hammered-effect spray paint in copper.
 View in gallery
 The spray application was polish, and the stop upshot was a more even metal look. Let your letters dry out completely.
 View in gallery
 When the letters are dry out, it'southward time to mucilage on your "lights." Remove the hanging parts off your ornaments.
 View in gallery
 Quickly but advisedly, apply hot glue to the opening of the ornament. Tip: To cut downwards on the hot gum "hairs" or "strings" that can happen, apply the glue around the circumvolve of the opening, and then continue circling the ornament's opening as you move the hot gum gun away from the ornamentation. This will make any glue-strings fall onto the circle opening, and thus be disguised, than follow out in long strands from the ornament to the tip of the retreating glue gun.
 View in gallery
 Detect one of your painted reinforcement labels. This is where the gummy ornament opening will go. It's a pretty slick system, really.
 View in gallery
 Identify the ornament on the reinforcement label, then repeat for all other labels on all other letters.
 View in gallery
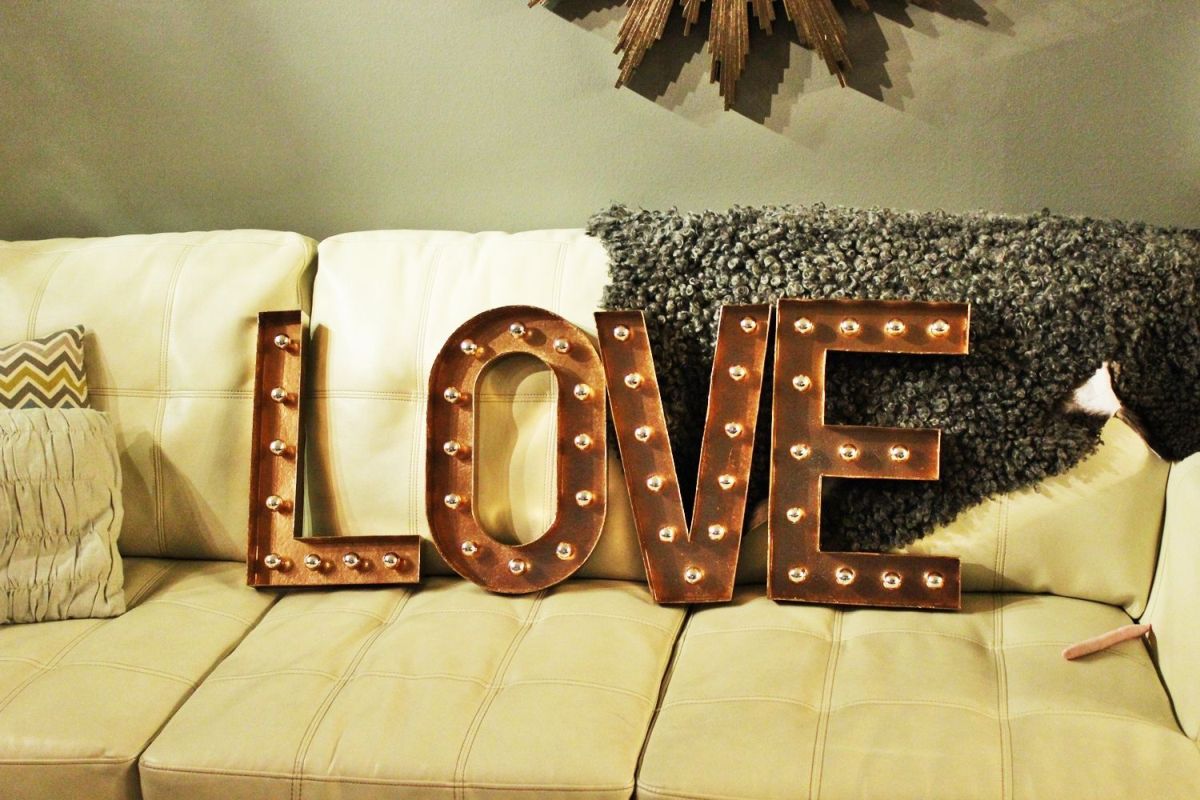
 Put your letters upwards on the mantel, closer to the stockings or wherever yous're putting them. Congratulations! You've just created versatile marquee messages that can be hands rearranged into any give-and-take or order you lot'd like.
 View in gallery
 I love the prominence of this size of alphabetic character. And the copper color is a lovely one – non super in-your-face, but instead a cool and industrial-feeling bit of décor.
 View in gallery
 And recall that "Five" you (mayhap) did forth with the other letters? Y'all're ready for Valentine'due south Solar day! Congrats!
 View in gallery
 Enjoy creating a cute infinite for your holiday flavour.
Source: https://www.homedit.com/marquee-sign-letters/
Belum ada Komentar untuk "DIY Marquee Sign Letters"
Posting Komentar